The Healing Blossom

Sunday, January 27, 2013

RECIPE: Healing Broth

I use to use the broth on my Whole Body Detox plan to assist in detoxification and to take away cravings when trying to lose weight. I now prefer to use homemade bone broth. I'm leaving this up because I have friends that still like homemade vegetable broth.

Healing Broth


Ingredients
  • 10 cups of filtered water (or enough water to submerse the veggies)
  • 4 one-inch slices of fresh ginger (use more if you like the zing of ginger)
  • 4 cloves of whole garlic (not chopped or crushed)
  • 1 large onion, chopped
  • 2 carrots, sliced
  • 2 celery stalks
  • 1-2 cups of sweet potatoes
  • 2 cups of chopped beet greens (or use kale, collard greens, chard, dandelion, cilantro or other greens. I prefer beet greens, it gives the broth a nice red color)
  • ½ cup of cabbage
  • ½ cup fresh shitake mushrooms
  • 1 cup of daikon or white radish root and tops (ideal, but optional)
  • 1 teaspoon of Dulse powder (or use a few sheets of nori)
  • Himalayan salt, to taste

  1. Add all the ingredients to a large stock pot and place on a low boil for approximately 60 minutes. It may take a little longer. Simply continue to boil to taste.
  2. Cool, strain (throw out the cooked vegetables), and store in a large, tightly-sealed glass container in the fridge.

Heat gently and drink up to 2–4 cups a day. If possible, avoid using the microwave. Heat on the stove or diluted with hot water heated in a teapot or heated water filter spout.

Makes 8 cups

Blossom Tips:

Save, wash and re-use glass juice bottles or Kombucha bottles for your broth.

I prefer to make the broth very concentrated so it doesn’t take up too much space in my fridge (I always make a double batch). Plus I don’t like to heat it up in the microwave and I don’t care for it cold. I prefer to pour the concentrated broth into a mug and fill half way. Then I add hot water to dilute it and warm it up.

Sunday, December 23, 2012

RECIPE: Dark Chocolate No-bake Oatmeal Cookies

   
Dark Chocolate No-bake Oatmeal Cookies (without peanut butter)

 
These cookies are probably the first thing I learned how to cook. Recently I tried to find that old recipe on-line but all of the similar recipes were a bit bland. Most of the recipes included peanut butter and not very much chocolate...making them kinda blah...

I played with the ingredients to make the cookies like I remembered them. I tossed out the peanut butter and doubled or tripled the cocoa powder to get the right amount. YES! This is exactly how I remembered them.
 
Sure this isn't my typical healthy recipe posting as it does include sugar and butter. I tried to make them with sugar and butter alternatives but it didn't work.
 
After all, it's the holidays and we're all allowed to splurge a little, right?? I'm still remaining gluten-free but adding in a little dairy and sugar won't hurt. That being said, this recipe cannot be made vegan or Paleo friendly like my others. But it can be made gluten free - at least for those who can eat oats. If you are making the cookies for someone with celiacs, make sure to purchase gluten free oats. Many companies that process oats also process wheat and the oats can be cross contaminated. For someone with celiacs, the oats need to be certified gluten-free. Whole Foods sells gluten-free oats.

The original recipes called for quick oats...the more processed version oats with less fiber. My attempt to make this recipe a little healthier includes rolled oats instead of quick oats. I actually prefer them this way, it has more of a chewy texture like a granola bar.


The ingredients are simple, if you want to make these cookies, here's your shopping list:

2 cups of Sugar
1/2 cup of Cocoa
1/2 cup of Vanilla Almond Milk
1 stick of Butter (melted)
1 teaspoon of Salt
4 cups Rolled Oats
1 teaspoon of Vanilla
Wax paper


Makes 48 cookies

The trick to this recipe is timing. If you don't cook it long enough, you'll have really gooey cookies. If you cook it too long, they can be hard as rocks.

Tip: I melt the butter first - or at least make sure it's room temp. Make sure you use REAL butter - not that stuff made from oil that looks like butter. Get the real stuff. 1 stick of butter is equal to 1/2 cup or 1/4 lb. of butter. I usually put my butter in a glass bowl and set it on the stove or in the oven its  already warm, I don't use a microwave.

If you don't have almond milk, you can use regular milk. I have not tested the recipe with soy, hemp or coconut milk.

Pre-measure your oats and vanilla before you start cooking. This will save you time and hopefully avoid over cooking (remember it will continue to cook after you've removed it from heat so it's best to have the oats, vanilla, and anything else you want to add all ready to go.

Also, lay out your wax paper.


Here are the 6 simple steps:

1. In a saucepan (My 10 cup saucepan worked perfect) combine melted butter, sugar, cocoa and salt. Do not turn on heat until the ingredients have been stirred together. Or if you melted the butter in the saucepan remove from heat. Combine all other ingredients in a bowl, stir, then add to the butter mixture and stir together.


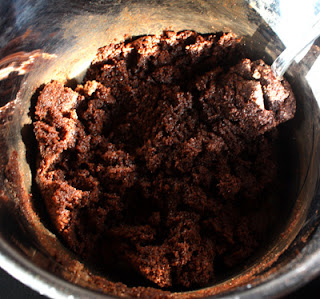
This image shows all the ingredients mixed together before the heat is turned on.


2. Turn heat to just above medium, stir ingredients until sugar is melted.


4. Bring to a boil and boil for 1-2 minutes. I usually boil 1 minute and 30 seconds....I like them a little gooey.


Do not over cook or they will be rock hard.


5. Remove saucepan from heat and stir in oats.


6. Stir in vanilla and anything else you choose to add such as walnuts or coconut.


Make sure to completely cover oats with chocolate mixture.


7. Drop by spoonful on wax paper and let cool. They will be gooey at first - the longer they sit, the harder they get.


ENJOY!!

Happy Holidays from The Healing Blossom


Monday, December 10, 2012

RECIPE: Chocolacado Pie


Chocolacado Pie

When I was young my Mom always made a delicious pudding dessert for the holidays. It was made with Jell-o pudding, Cool Whip and it had a buttery/flour crust (all food products I’ve chosen to no longer consume). On my journey to good health, I try to avoid dairy products, gluten and processed foods. That means all the foods I grew up on are no longer an option. 

I’ve been experimenting with raw, gluten free and dairy free desserts. After I came across a recipe for a raw chocolate pudding in Whole Living magazine, I dreamed of that tasty pudding dessert my Mom use to make and I couldn’t wait to throw it together. My aunts use to call it "Better than Sex Cake" and "Sex in a Pan"...that's how awesome it was.

My natural version is even more amazing. The pie is named after the combination of chocolate and avocado: Chocolacado. Some people are thrown off by the avocados in the ingredient list. Don't worry, avocados have a mild flavor that are easily masked by the chocolate and honey. When blended, the avocados make a creamy texture, like pudding. If you're worried your kids won't eat it, don't tell them it has avocados - at least until after they've tried it.

Coconut milk makes an excellent replacement for whip cream. It doesn't separate when stored in the fridge like dairy whip cream, it's a lot healthier and tastier than cool whip.

This dessert can be made for those following a raw food, vegan, gluten free and even a paleo diet.

Chocolacado Pie Ingredient List
1 can of coconut milk (cold, stored in fridge over night)
2 teaspoons of vanilla extract
¼ cup and 1-2 tablespoons of raw honey
2 cups walnuts
1 cup dates
2 tablespoons ground flax (hemp hearts work well too)
1 tablespoon coconut oil
3 avocados, ripe
6 tablespoons of cocoa power
Pinch of Himalayan salt
Dark chocolate bar or unsweetened coconut flake for topping (optional)


METHOD:

Coconut Whip Cream
With a mixer whip:
1 cold can of coconut milk (use the entire can)
Whip for 5 minutes or until light and fluffy.
Add 1 tsp of vanilla and 1-2 tablespoons of honey.
Whip again – makes 4 cups
Place whip cream in the fridge until ready to use.

Crust
In a food processor, combine:
2 cups walnuts
1 cup dates
2 tablespoons ground flax
1 tablespoon coconut oil
Mix until dough consistency
Press dough into square pyrex dish or round cake pan.
Store in fridge until ready to use.

Chocolate Pudding:
In a food processor, combine:
3 avocados (slice in half, remove pit, scrape out avocado)
¼ cup honey
6 tablespoons of cocoa power
1 teaspoon of vanilla
Blend until pudding consistency.
Add 1 cup coconut whip cream.
Sprinkle with Himalayan salt.
Blend again until mixed.
Taste - if you can taste any avocado, add a small splash of vanilla, a tablespoon of honey and a little more cocoa powder. Blend again.

Put it all together:
Smooth chocolate pudding over the crust. It should create a layer about 1 inch thick.
Smooth remaining coconut whip cream on top.
Top with grated dark chocolate, chopped walnuts or unsweetened coconut flakes
Store in the fridge until ready to use. I recommend letting it set-up in the fridge for a couple of hours before serving or the coconut whip cream may be a little too watery.


For step by step detailed instructions, see the photos and steps below.

Happy Holidays from The Healing Blossom - www.thehealingblossom.com


Step by step instructions:
Before you gather your ingredients, place the bowl you'll be using to make your coconut whip cream in the freezer. Use a stainless steel bowl if you have one and keep it in the freezer for 5 minutes.


Ingredients:


3 Avocados (plus one extra just in case one is not ripe enough or one has gone bad)

1/4 Honey and 1-2 Tablespoons (make sure you buy real honey, not that high fructose corn syrup stuff some brands and conventional grocery stores try to pass off as honey). You could also try maple syrup in place of honey.

6 tablespoons cocoa powder

2 cups walnuts

3 tsp vanilla extract

1 can coconut milk (regular not light) - must be cold

1 cup pitted dates

Missing from photo:

2 tablespoons ground flax seed

1 tablespoon Coconut oil

Pinch of Himalayan salt


TIP:  Purchase full fat coconut milk that does not have any added ingredients. I recommend Whole Foods brand. Do not use Light coconut milk – it will be too watery. Make sure to store in the fridge overnight.


Prepare Coconut Whip Cream

1. Remove your can of coconut milk from the fridge and your bowl from the freezer. If you've used a good quality coconut milk, when you open the can, it should look like this - very thick. Scoop the contents into your bowl.

NOTE: If making a thicker whip cream, you would just use the cream and not use any of the water. Tip: Open can upside down so you can pour out the coconut water from underneath the thick coconut cream.

For this recipe, I always use the whole can - both the cream and the water. The pie will thicken in the fridge. If you'll be serving this immediately, I would recommend, reserving some of the water for a thicker cream.

I always keep a few cans in the fridge, just in case you need to whip up some cream.


2. Mix on high until it fluffs up - about 5 minutes.

3. Add 1 teaspoons of vanilla extract and 2 tablespoons of honey. Mix again.

4. Place bowl of whip cream in the fridge.


Prepare Crust

This is a gluten free, raw and vegan crust.

5. In a food processor add: 2 cups of walnuts, 1 cup of pitted dates, 2 tablespoons of ground flax seed (or hemp hearts) and 1 tablespoon of coconut oil.


If your food processor starts to jump around or it doesn't sound right, there may be a date pit stuck on the blade. Stop the processor and look for a pit. Then continue until you reached the desired consistency. (It happens every time I process dates)


6. Process until it becomes doughy. After it turns into a dough, I like to add a few more walnuts and pulse....I like the chunks of nuts.


7. Next place your dough in a square pyrex dish, a deep pie pan or a cake pan. For this dish I used a round cake pan.

Make sure you do not use a shallow pie tin.

8. Press dough in pan to make a crust.

9. Place pan in the fridge until you are ready to fill it.


Prepare Chocolate Pudding

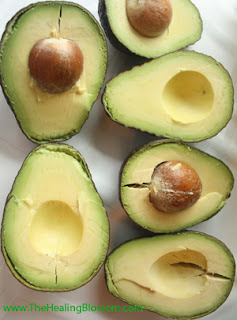
Avocados must be perfectly ripe or a little overly ripe is okay.  If they are overly ripe, make sure they do not taste bad. To ripen avocados, place in a brown paper bag until ripe. (This may take a few days but it will be quicker than just leaving them in the pantry or on the counter.

I always buy an extra avocado just in case one goes bad.
  
10. Rinse your avocados, then slice in half.


11. To remove the pit, use a large knife. BE VERY CAREFUL. Just hit the pit in the middle with the knife. See photo.

If the avocados are ripe, the pits will slide right out. 


12. Next scoop the avocados out with a large spoon into the food processor.


13. Add 1/4 cup of honey, 6 tablespoons of cocoa powder and 1 teaspoon of vanilla.


14. Blend until smooth like pudding.

15. Add 1 cup of coconut whip cream, pinch of Himalayan salt and blend again until mixed.


16. Remove the crust from the fridge and add the pudding on top.


17. Smooth the pudding creating a thick layer.


18. Remove the coconut whip cream from the fridge and smooth a layer on top of the pudding.


19. Grate some chocolate or add some chopped walnuts or flaked coconut to the top.

20. Store in the fridge until ready to serve.

Immediately after I made the pie, I scooped this slice out. It did not have time to set-up in the fridge so it's a little watery. It still tastes delicious, but it looks better if the cream has had time to set-up in the fridge for a couple of hours.

I recommend serving the same day but it can be stored in the fridge for a few days.


Enjoy!!!

HAPPY HOLIDAYS!


Friday, November 30, 2012

Special - New Year, New You! January 5th


This month I'm offering a discount on my detox plan.
This plan is 30 days and it's LIFE CHANGING.


How my plan is different than the Master Cleanse:

1. The Master Cleanse will trigger a detox, but without the proper vitamins and nutrients, the flood of toxins won't know where to go. You can make yourself really sick and just move toxins from one place to another. It's like turning on the faucet and plugging the drain.

2. My Whole Body Reboot plan includes vitamins and supplements to repair vitamin deficiencies and assist your body in detoxing.

3. You get to eat food! You'll be eating easy to digest foods such as steamed veggies, salmon, brown rice and quinoa. Chocolate, vanilla or berry protein shakes with ground flax seed and Green Superfoods. Plus a variety of soups and salads. That sounds a lot better than lemon juice and maple syrup, doesn't it?

4. My Whole Body Reboot is SAFE. You are getting the vitamins and nutrients your body needs while your body is detoxing - the right way.


Are you a candidate for my Whole Body Reboot?

Unless you are on living planet free of pollution and processed foods, you are a candidate for this detox plan. (Must be 18 or older)

Do you want to lose weight?
Do you want to increase your energy?
Do you want to turn back the clock? Just because you are getting older, doesn't mean you have to feel old.
Do you want identify potential food intolerances and allergies?
Do you want to reverse or minimize health problems?
Do you want to learn about why the foods you are eating are making you sick?
Do you want to feel better?

If you answered yes to ANY of these questions, you need to try this detox plan.


To see what this detox can do, read my blog about the health problems I use to have. Several years ago I found a detox similar to this and tried it for 7 days. I felt great and wanted another go. Since then I've completed it several times and researched all of the products. I've improved it by adding to it, making it easier, making a workbook and a cookbook. Several of my friends have all tried it with awesome results.


DETOX FAQ

How do I save $50 off the Whole Body Reboot?

To get this discount, order your detox kit by December 17th and start our group detox on January 5th.

If you would like to work out a payment plan, please contact me. A deposit is required at the time of your order and the kit must be paid in full by 1/4/12 for local pick-up (SLC, UT) or by 12/28/12 for out of state.


Can I order the kit by December 17th and start the detox at a later date in January, after the 5th?

When you start the program you will receive daily emails from me as your detox coach. The $50 discount applies to those who start the program on the 5th. If you choose not to start the program on the 5th, that's up to you. The coaching and daily emails you'll be receiving will all corispond with the 5th start date.


January won't work for me, will you be offereing this discount again?

YES - if I have enough people to do one together. I will offer that discount Feb 2nd, 2013 and March 2nd, 2013 if I have enough people. You can also organize your own group detox (4 or more people) and pick your start date.


How do I sign up and order my kit?

Please contact me and I'll send you the release form, or download it here. You can pay with your Paypal account or use a credit card through Paypal. Locals (SLC, UT) can also pay with cash. The form must be signed and emailed back to me. A $50 minimum deposit is required to order your kit. Kits must be ordered 2-3 weeks before the start date.


Once my kit is ordered, is there anything else I can do to prepare?

Yes, you'll need to eliminate caffiene from your diet. If you consume caffiene daily, please contact me for a caffiene elimination plan.

You'll want to start making changes in your diet, before we start the detox, you must remove all white flour and sugar. It's best to ease off and make sure they are completly eliminated 5 days before you start.

If you don't own a yoga mat, you'll need to purchase one. Yoga plays an important role in releasing toxins. I recommend finding a yoga studio too - the best instructors teach at studios. Many gyms offer yoga classes but I've yet to find one that is as good as the one taught at a studio. Of course this all depends on the instructor. A good instructor walks around the class and makes sure you are doing the poses correctly. A bad instructor sits at the front doing all of the poses and never gets up to correct people. Finding a good studio will make a huge difference in your results.

You'll need to make sure your drinking plenty of filtered water. I recommend getting a PUR or Britta water filter and a BPA free water bottle. A Blender Bottle also work great for preparing your psyllium and shakes.


30 Days is a long time to stick to a plan, do you have shorter plans?

30 days is nothing compared to the 12,000 days you've lived and have not been detoxing. I do offer a "7 Day Sampler kit" - this kit will have enough vitamins, supplements and shakes for 7 days. It has the workbook but it will not have the full cook book. The 7 day kit works great for those who don't want to lose any weight or maybe just 5-7 pounds AND who are generally pretty great health. The 7 day plan is $99.


Please contact me to sign up or if you have any questions.

Thanks,
Angela

Thursday, November 29, 2012

RECIPE - Coconut Whip Cream

Coconut Whip Cream
1 full can of coconut milk makes 4 cups of whip cream.
This is an awesome alternative to dairy whip cream. It tastes better and doesn’t separate when stored in the fridge for a few days.

Ingredients:
1 can of cold coconut milk
1 tablespoon of honey (or adjust to taste)
1 tsp of vanilla

Method:
1.       Make sure to buy full fat coconut milk free of preservatives and additives. Store coconut milk in the fridge overnight.
2.       When you open the can, the coconut cream and coconut water should be separated. For thick cream, only use the cream. I like to use both the cream and the water when making cream for fruit or pies.
3.       Add contents to mixer and whip for 5 minutes.
4.       Add honey and vanilla – whip again.
5.       Store in fridge until ready to use.

TIPS:

Don’t use light coconut milk and don’t try to make it with a  warm can. It will be too watery. I usually keep a few cans in the fridge just in case I decide to whip some up.

 You can also put your mixing bowl in the freezer for 5 minutes before you make it to help keep it cold while mixing.

 If you don’t use the coconut water, don’t dump it out. Drink it! It’s full of electrolytes. It can also be added to your morning smoothie or protein shake.

 If you’re not sure how thick you’ll want the cream. Start mixing with just the cream, when it’s light and fluffy, you can choose to add some coconut water and mix it again to reach your desired consistency. If it's a little too watery, put it in the fridge and it will thicken as it gets cold.

If you are making the cream for the Detox Friendly Pumpkin Pie, use the cream and the water - no honey.


Tuesday, October 23, 2012

Understanding Food Labels, Part 3: Sugar-Free & Artificial Sweeteners


In my last article we talked about how fat doesn’t make you fat and eating lowfat products can contribute to heart disease and other health problems. When fat is removed from a product, more sugar or artificial sweeteners will be added to make up for the loss of flavor.

You may see products advertising: “Light” or “Sugar-free” or “Low Calorie” or “Diet” – these labels should concern you. It’s a good idea to always read and understand the ingredients.

In the United States, six intensely sweet sugar substitutes have been approved for use: Aspartame (NutraSweet, Equal), Sucralose (Splenda), Neotame (NutraSweet), Acesulfame Potassium (Nutrinova), Saccharin (Sweet’N Low) and Stevia (extracts known a Reb-A, Truvia, PureVia). You may also see sugar alcohols such as Xylitol, Malitol and others that end in “ol.”

While these are all approved, they are not without controversy. Dr. Hyman explains in his book “The Blood Sugar Solution” how all sugar substitutes can make you fat.

Tricking your brain into thinking you are getting something sweet plays dirty tricks on your metabolism.  Artificial sweeteners disrupt the normal hormonal and neurological signals that control hunger and satiety (feeling full).  A study of rats that were fed artificially sweetened food found that their metabolism slowed down and they were triggered to consume more calories and gain more weight than rats fed sugar-sweetened food. In another alarming study, rats offered the choice of cocaine or artificial sweeteners always picked the artificial sweetener, even if the rats were previously programmed to be cocaine addicts.

Diet drink consumption has increased 400 percent since 1960.  Those who consume diet drinks regularly have a 200 percent increased risk of weight gain, a 36 percent increased risk of pre-diabetes or metabolic syndrome, and a 67 percent increased risk of diabetes. A study of 400 people found that those who drank two diet sodas a day or more increased their waist size by five times.

Another controversy associated with all artificial sweeteners is that they may cause many other health problems, including cancer. Aspartame for example, can cause tumors and contribute to MS, lupus, Alzheimer’s, Parkinson’s, headaches, memory loss, dizziness, vertigo and fatigue. Sucralose (Splenda) may adversely affect your immune system and may retard placental fetal development in pregnant women. Blurred vision, water retention, hypotension, headaches, bloating, cramping, gas, shortness of breath, hives, rashes, muscle pain, weakness and joint pain have been reported.

Stevia is a tropical plant that has been used as a sweetener and for medicinal purposes for hundreds of years. In 1991, after receiving an anonymous complaint, the FDA labeled stevia as an “unsafe food additive”. Clinical trials showed that stevia can mitigate cancer cell proliferation in laboratory mice, suggesting that it has properties that are anti-mutagenic. This finding was criticized on procedural grounds that the data was mishandled in such a way that even distilled water would appear mutagenic. Supporters of stevia believe the FDA was pressured by the artificial sweetener industry because the stevia plant is natural and cannot be patented. However, extracts from the plant can be patented. Fast forward to 2008, The Coca-Cola Company (Cargill) develops Truvia; PepsiCo and Merisant develop PureVia; and Corn Products International develops Enliten. The FDA gave no objection to these patented extracts. The use of stevia extracts in processed food is growing. These extracts are new to the food industry and some may caution overconsumption of these products. Minimal side effects have been reported – mostly gastro-intestinal (GI) distress and some nausea, but more research is needed. If you have a sugar addiction, consuming stevia may still trick your metabolism and increase your cravings.

 We need to ask ourselves, are diet beverages, gum, dressings, yogurts and other processed foods sweetened with artificial sweeteners worth the risk of weight gain, cancers, headaches and other health problems? Maybe, the question should ultimately be, should products with sugar be consumed instead of products with sugar substitutes? Well, good question! One great example of this question in our everyday lives is the following: Is Coke better than Diet Coke? Did you know that Coke is sweetened with high fructose corn syrup (a sugar), as opposed to Diet Coke which is sweetened with Aspartame (a sugar substitute)? Which is better? At this point one might think sugar is better, but recent studies have shown sugar is just as bad. Who knows? It’s kind of like asking if you want me to break your right leg or your left leg? But this is a question for another day. In fact, we’ll cover that in my next article.


Food Labels:

Understanding Food Labels - Lowfat vs.Full Fat

Understanding Food Labels - Natural Vs. Organic